Device Setup
This guide walks you through the step-by-step process of creating a site, setting up your generator monitoring device, linking it to the site, and activating an EnergyTrak Premium subscription.
Step 1: Site Preparation and Creation
A site MUST be created in EnergyTrak before device setup can be initiated.
Pre-Installation Checklist
Gathering this information prior to installation will prevent errors and minimize setup delays on-site. For each site, you will need the following information:
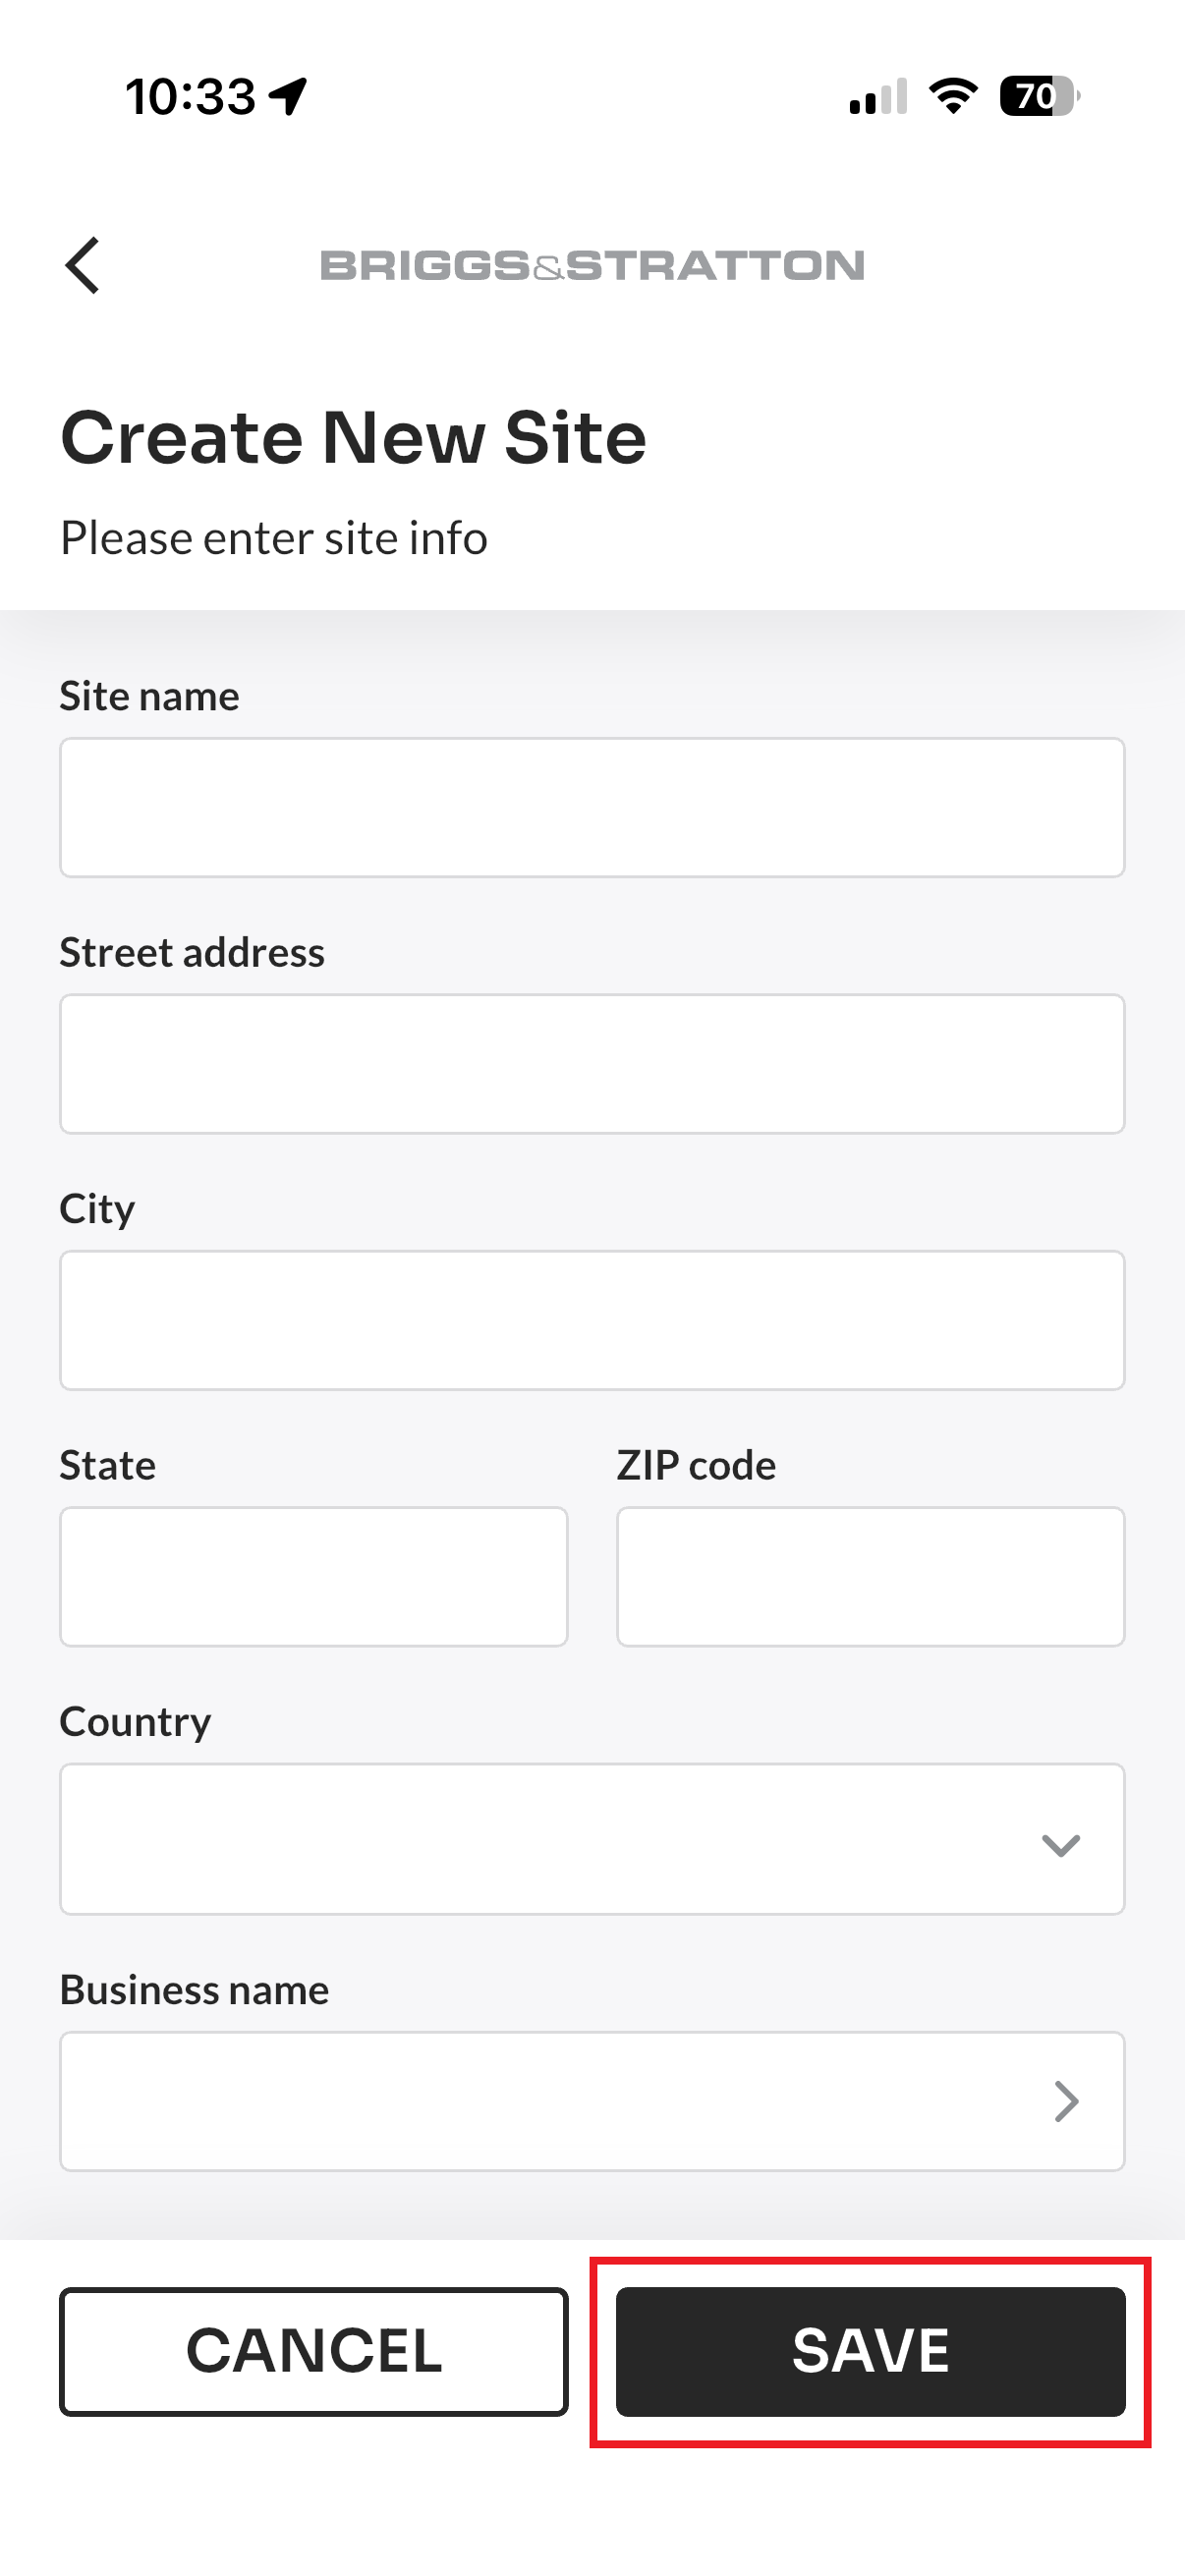
- Site Name and Site Address: The full physical address and site name as it should appear in the shared EnergyTrak fleet view.
- Owner Details: First name, last name, email address, phone number (to create their EnergyTrak account).
- Premium Payment Responsibility: Confirm if the Pro or System Owner will be responsible for the Premium subscription payment.
- Owner User Creation (optional): Before setup, you may optionally create new System Owner user accounts and assign them proactively to the site.
Site Creation Action
- Navigate to the Sites Screen in the EnergyTrak app.
- Select “Create New Site.”
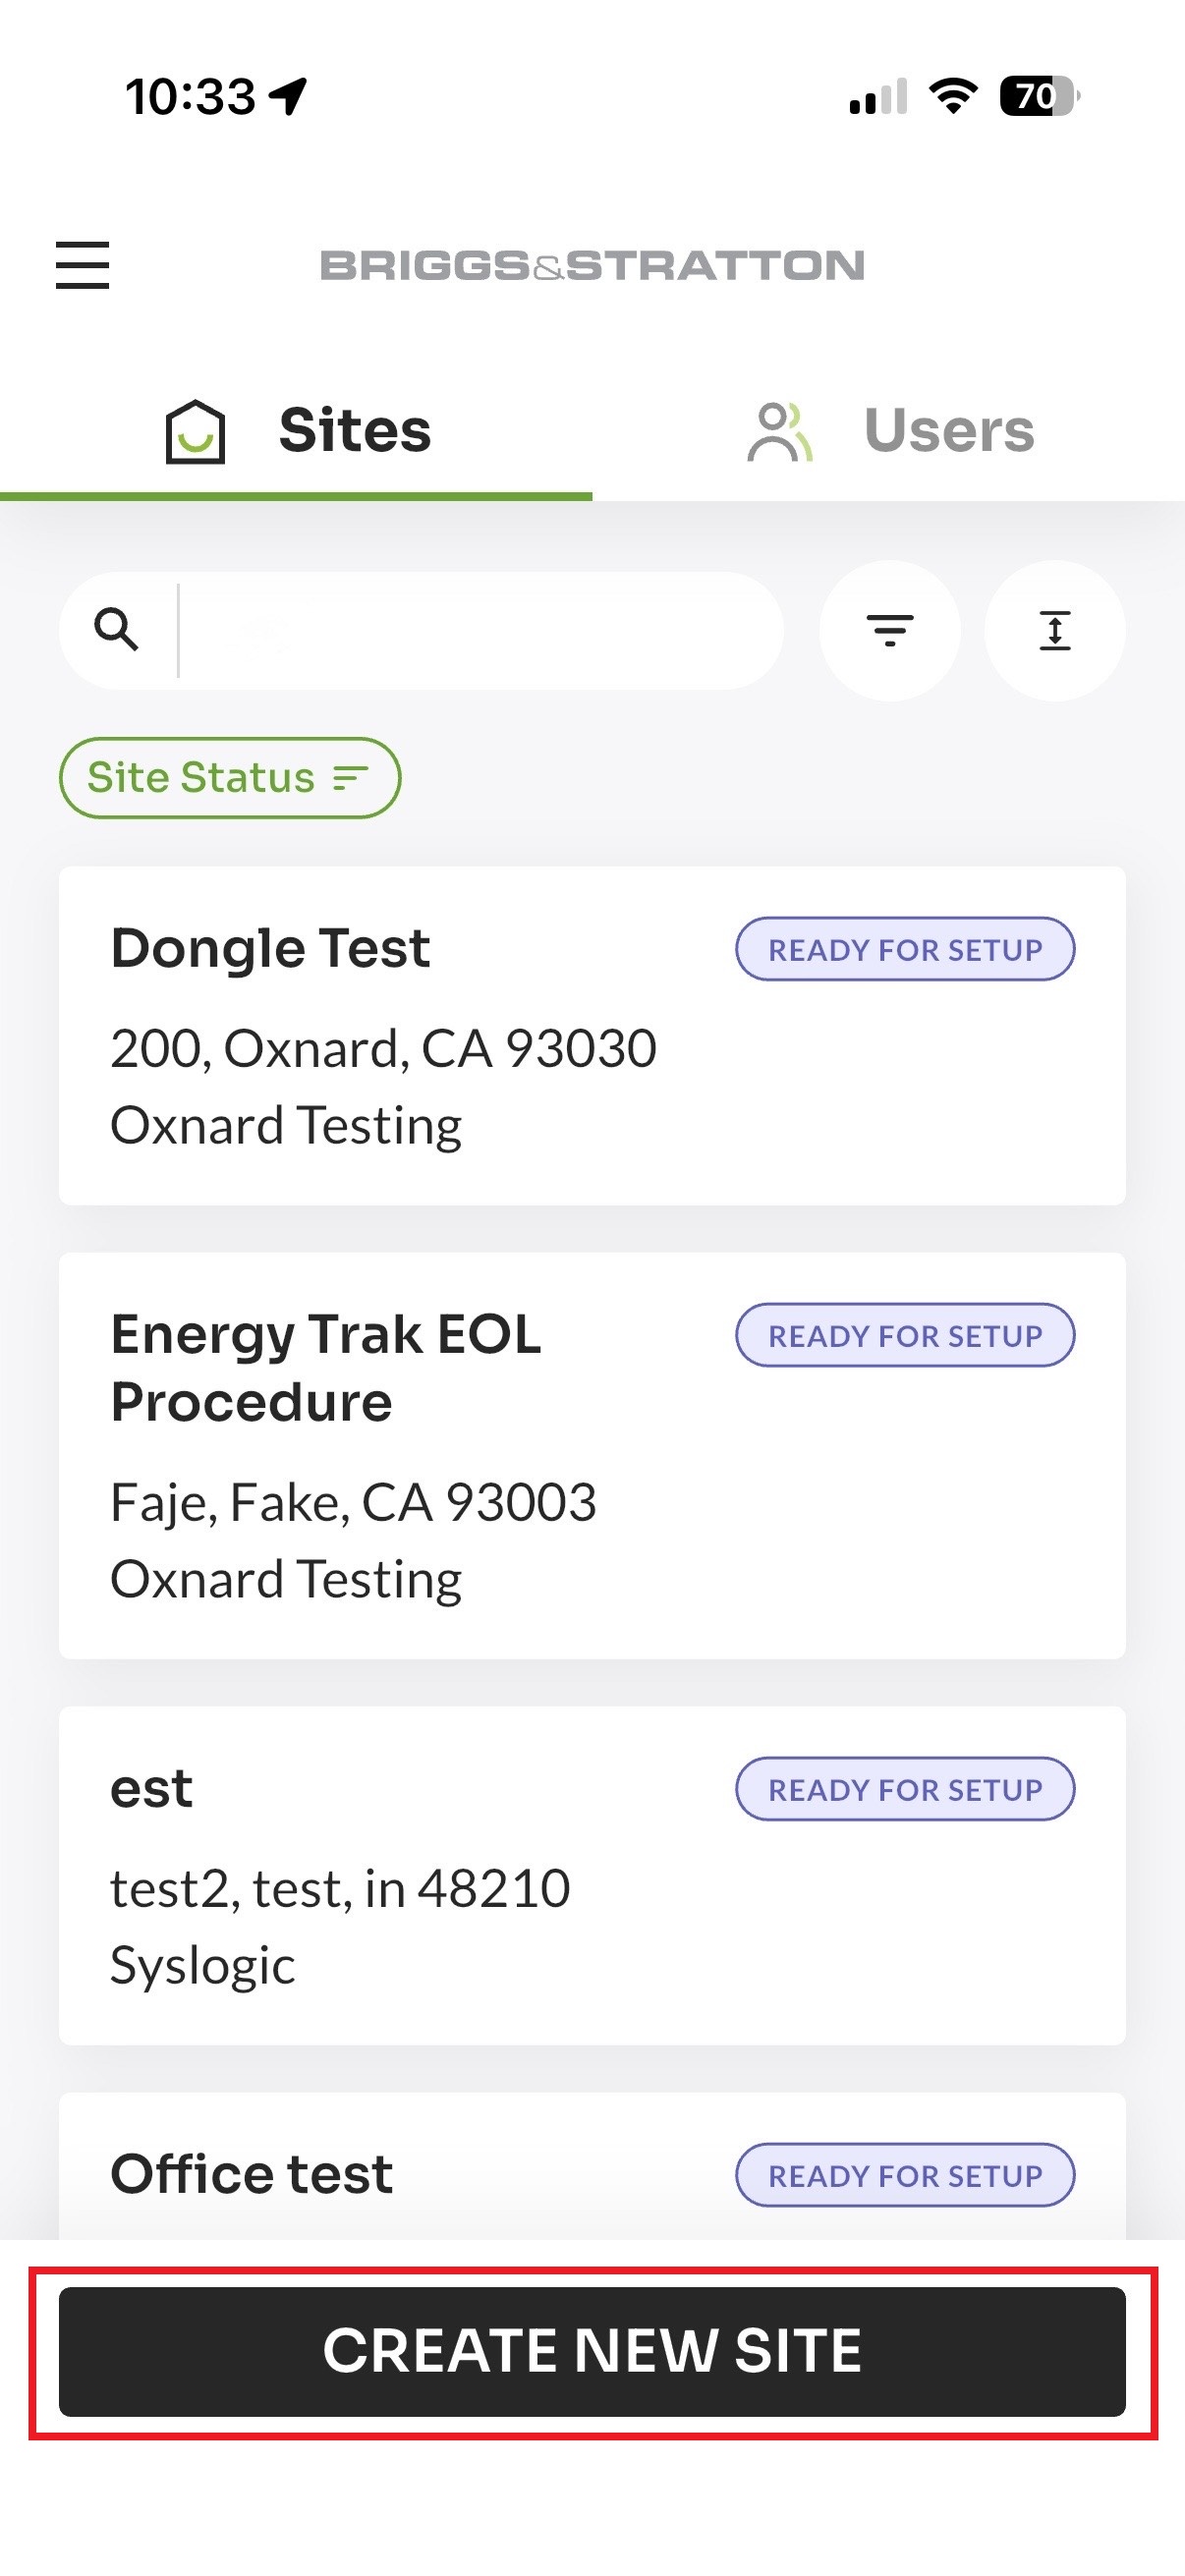
- Enter the information gathered in the checklist above.
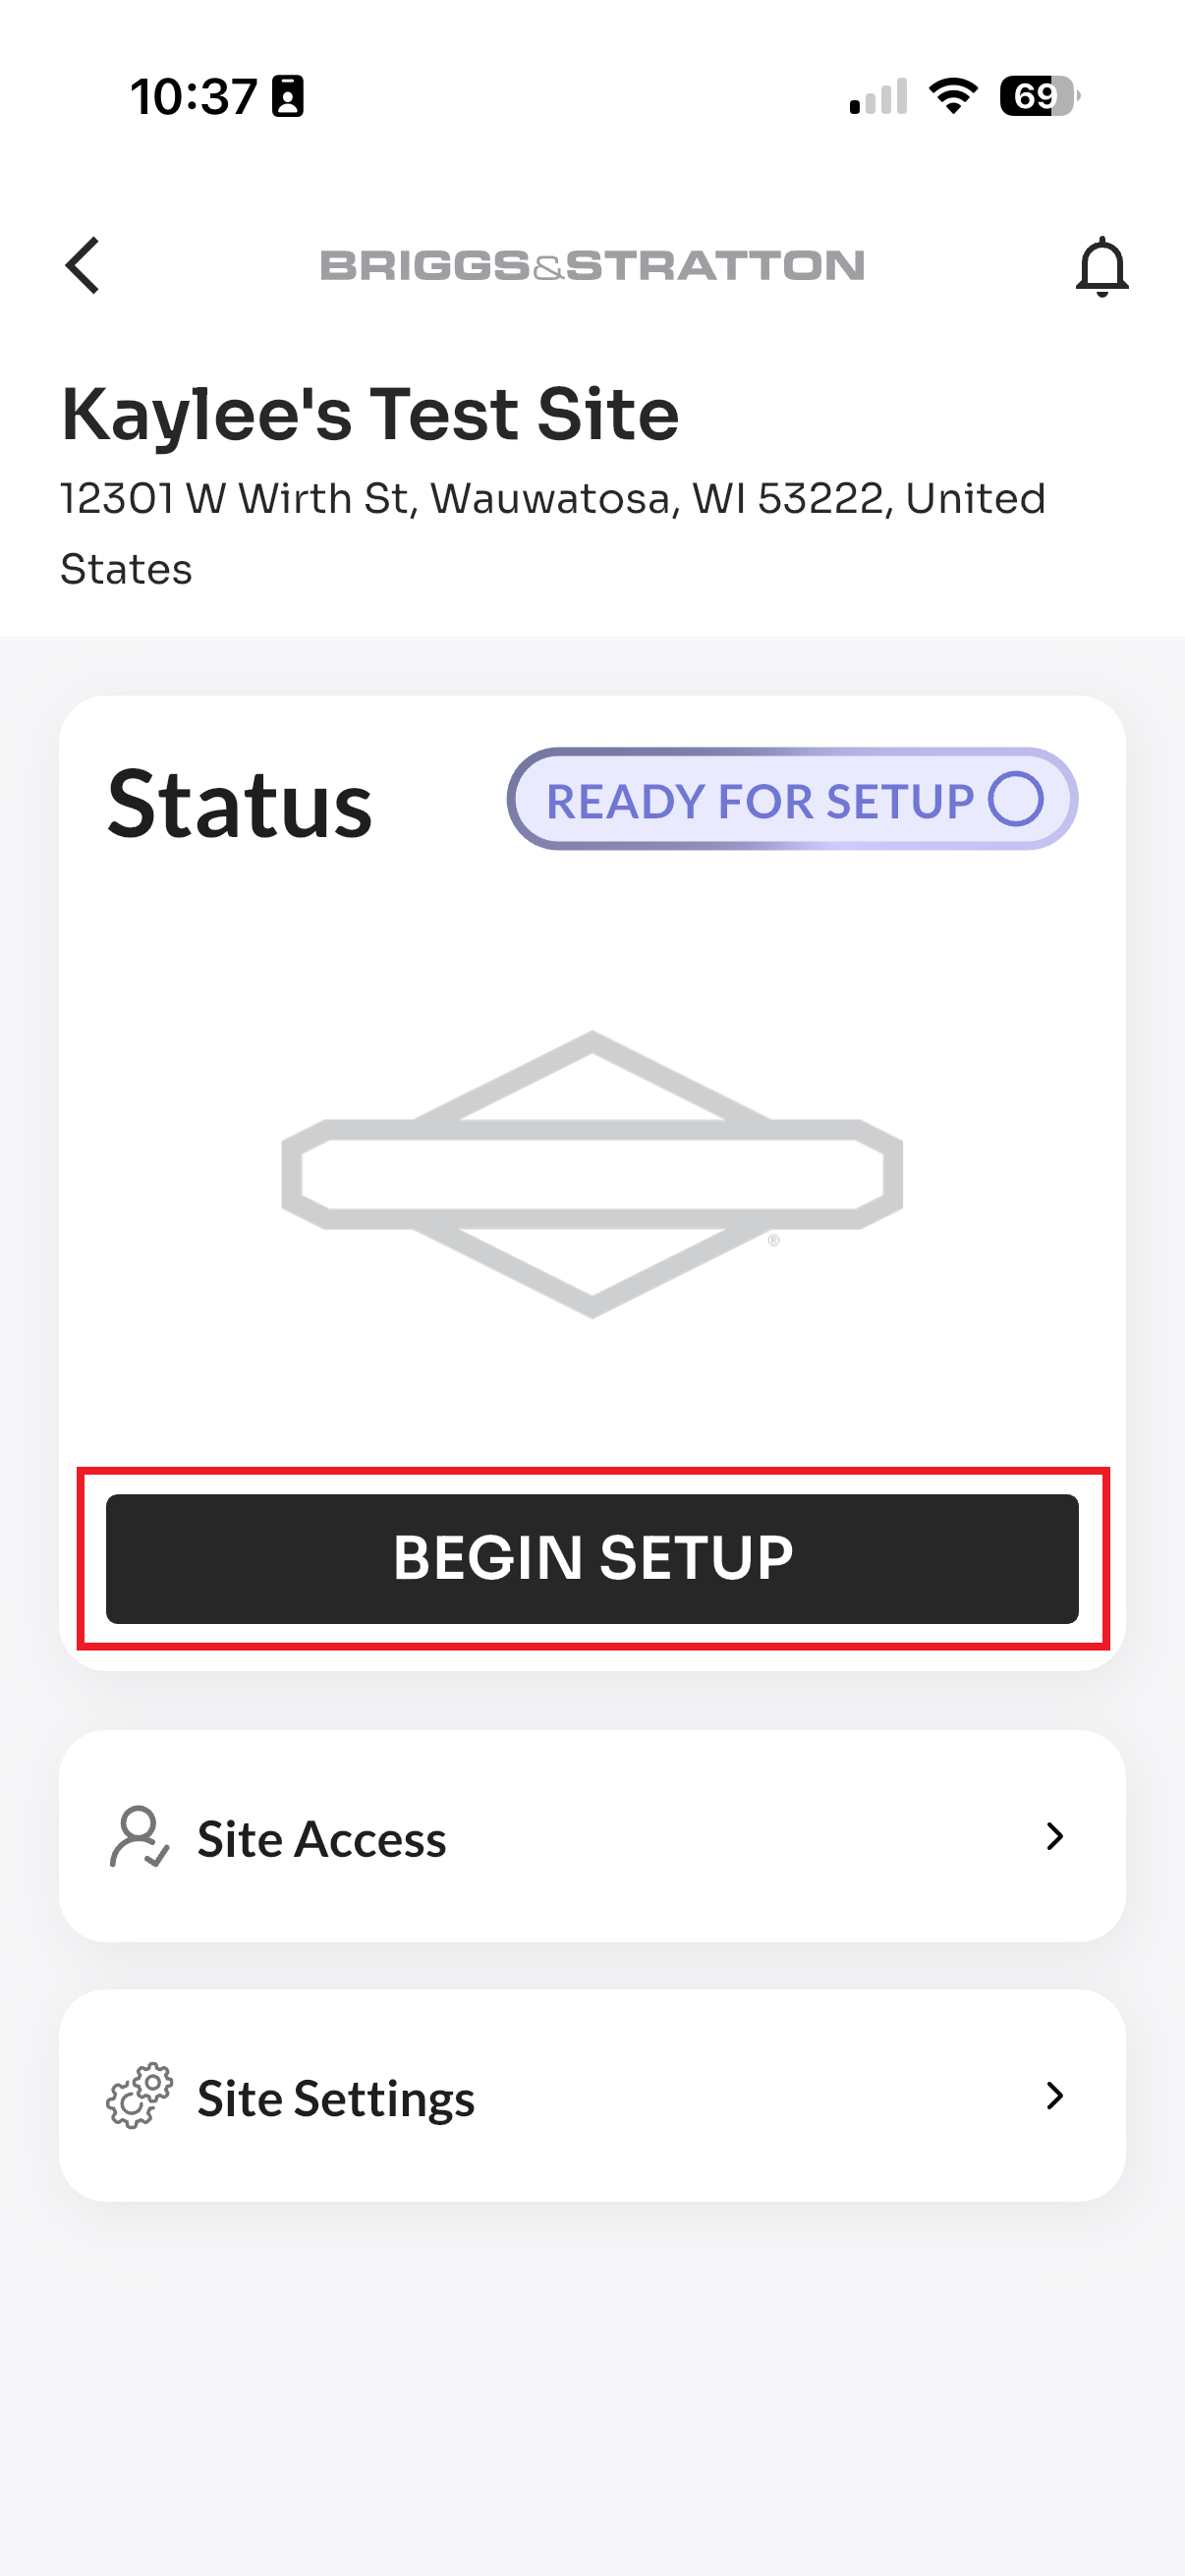
Step 2: Initiate Setup and Select System Type
The setup process begins in the EnergyTrak app after your device is installed.
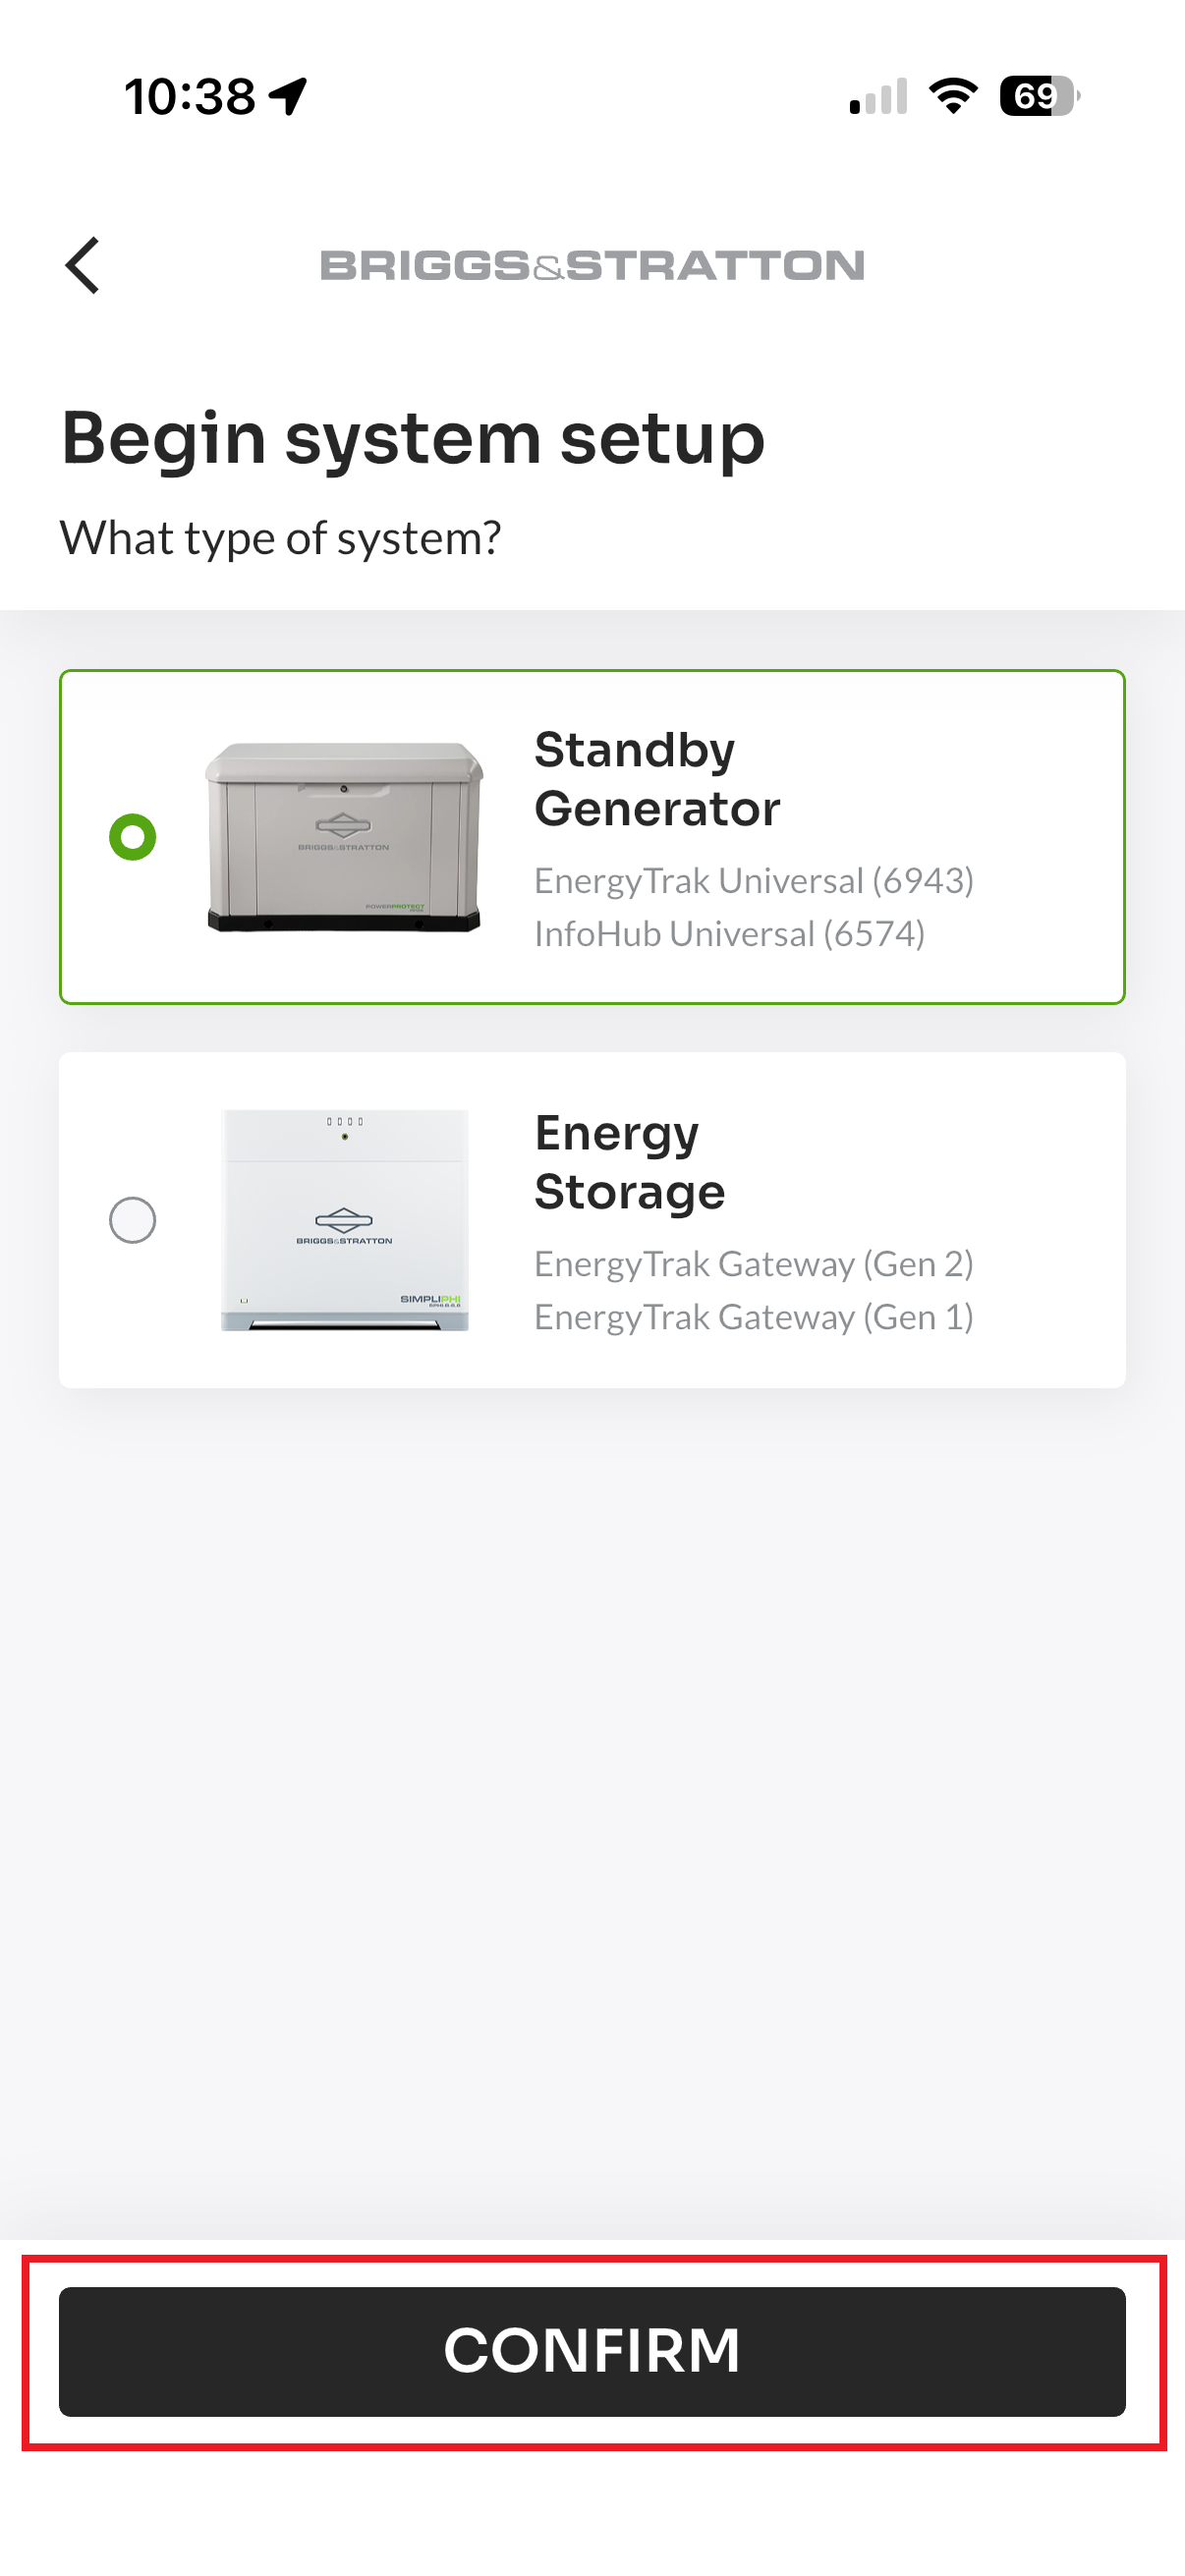
- Open the Site Dashboard and navigate to the “Begin Setup” button.
- Select the type of system you are setting up for (e.g., Standby Generator or Energy Storage System) and click “Confirm.”
Step 3: Device Validation
The app will confirm the identity of the monitoring device.
- Enter the monitoring device information (Monitoring Device ESN and/or Product Serial Number).
- The Electronic Serial Number (ESN) for your device is located on the Cal/Amp (InfoHub or EnergyTrak) device label.
- The Product Serial Number is located on the EnergyTrak Universal Kit part number box label.
- Click “Lookup Device.”
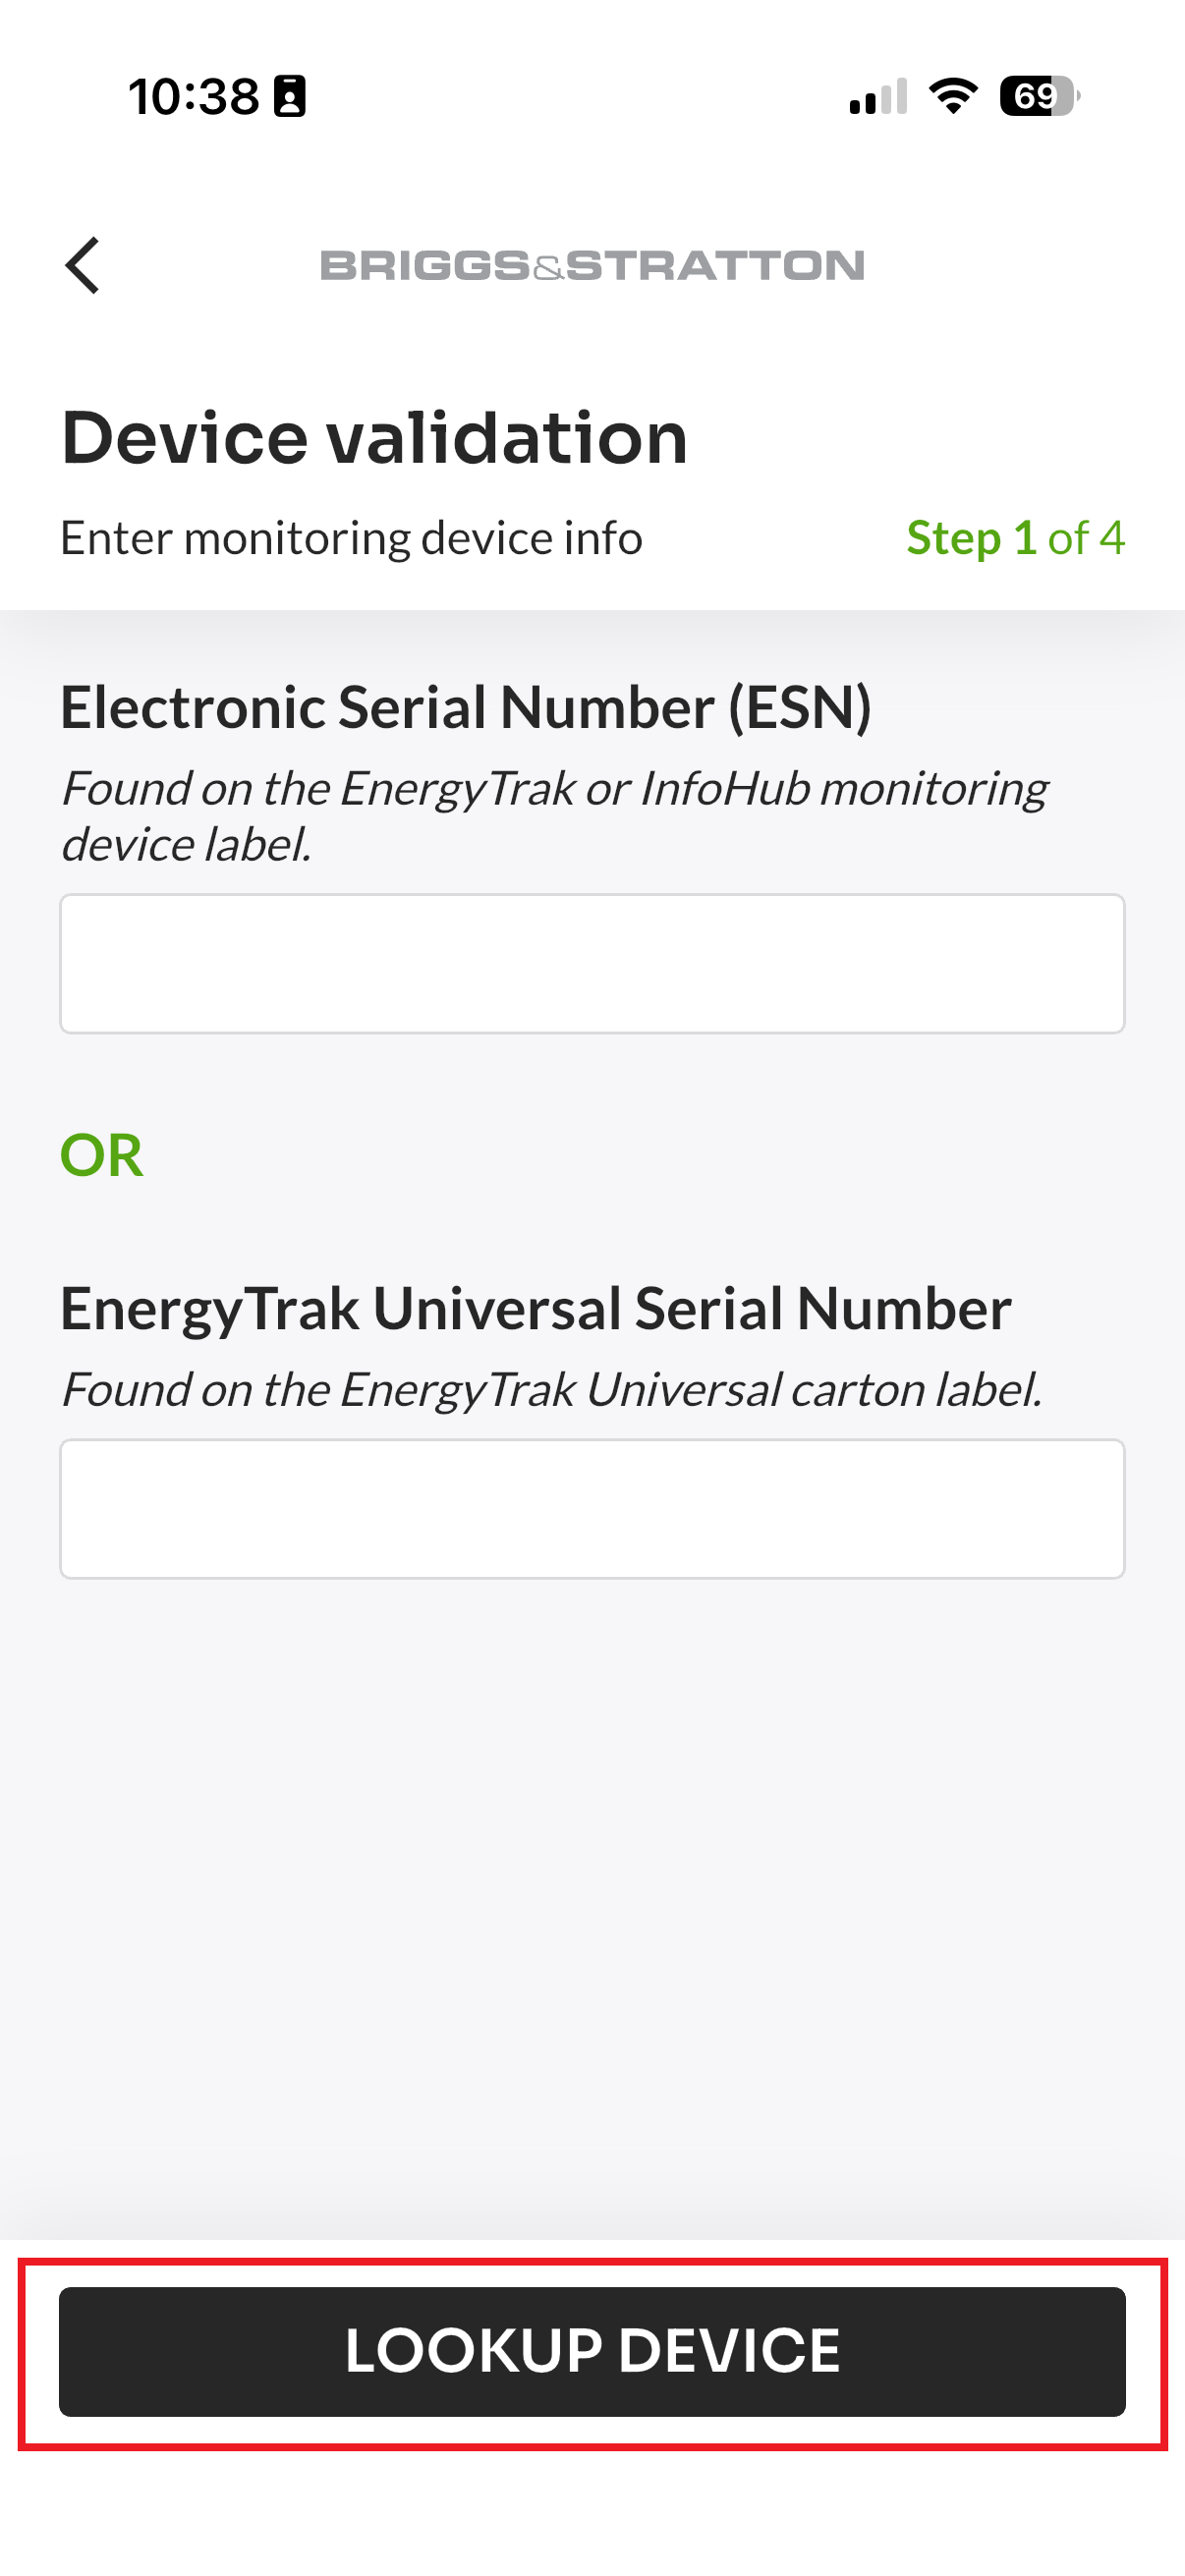
- Conflict Check:
- If the device is NOT associated with another site, the setup proceeds to the next step.
- If the device IS associated with another device, the system will prompt the user to a device conflict and removal flow.
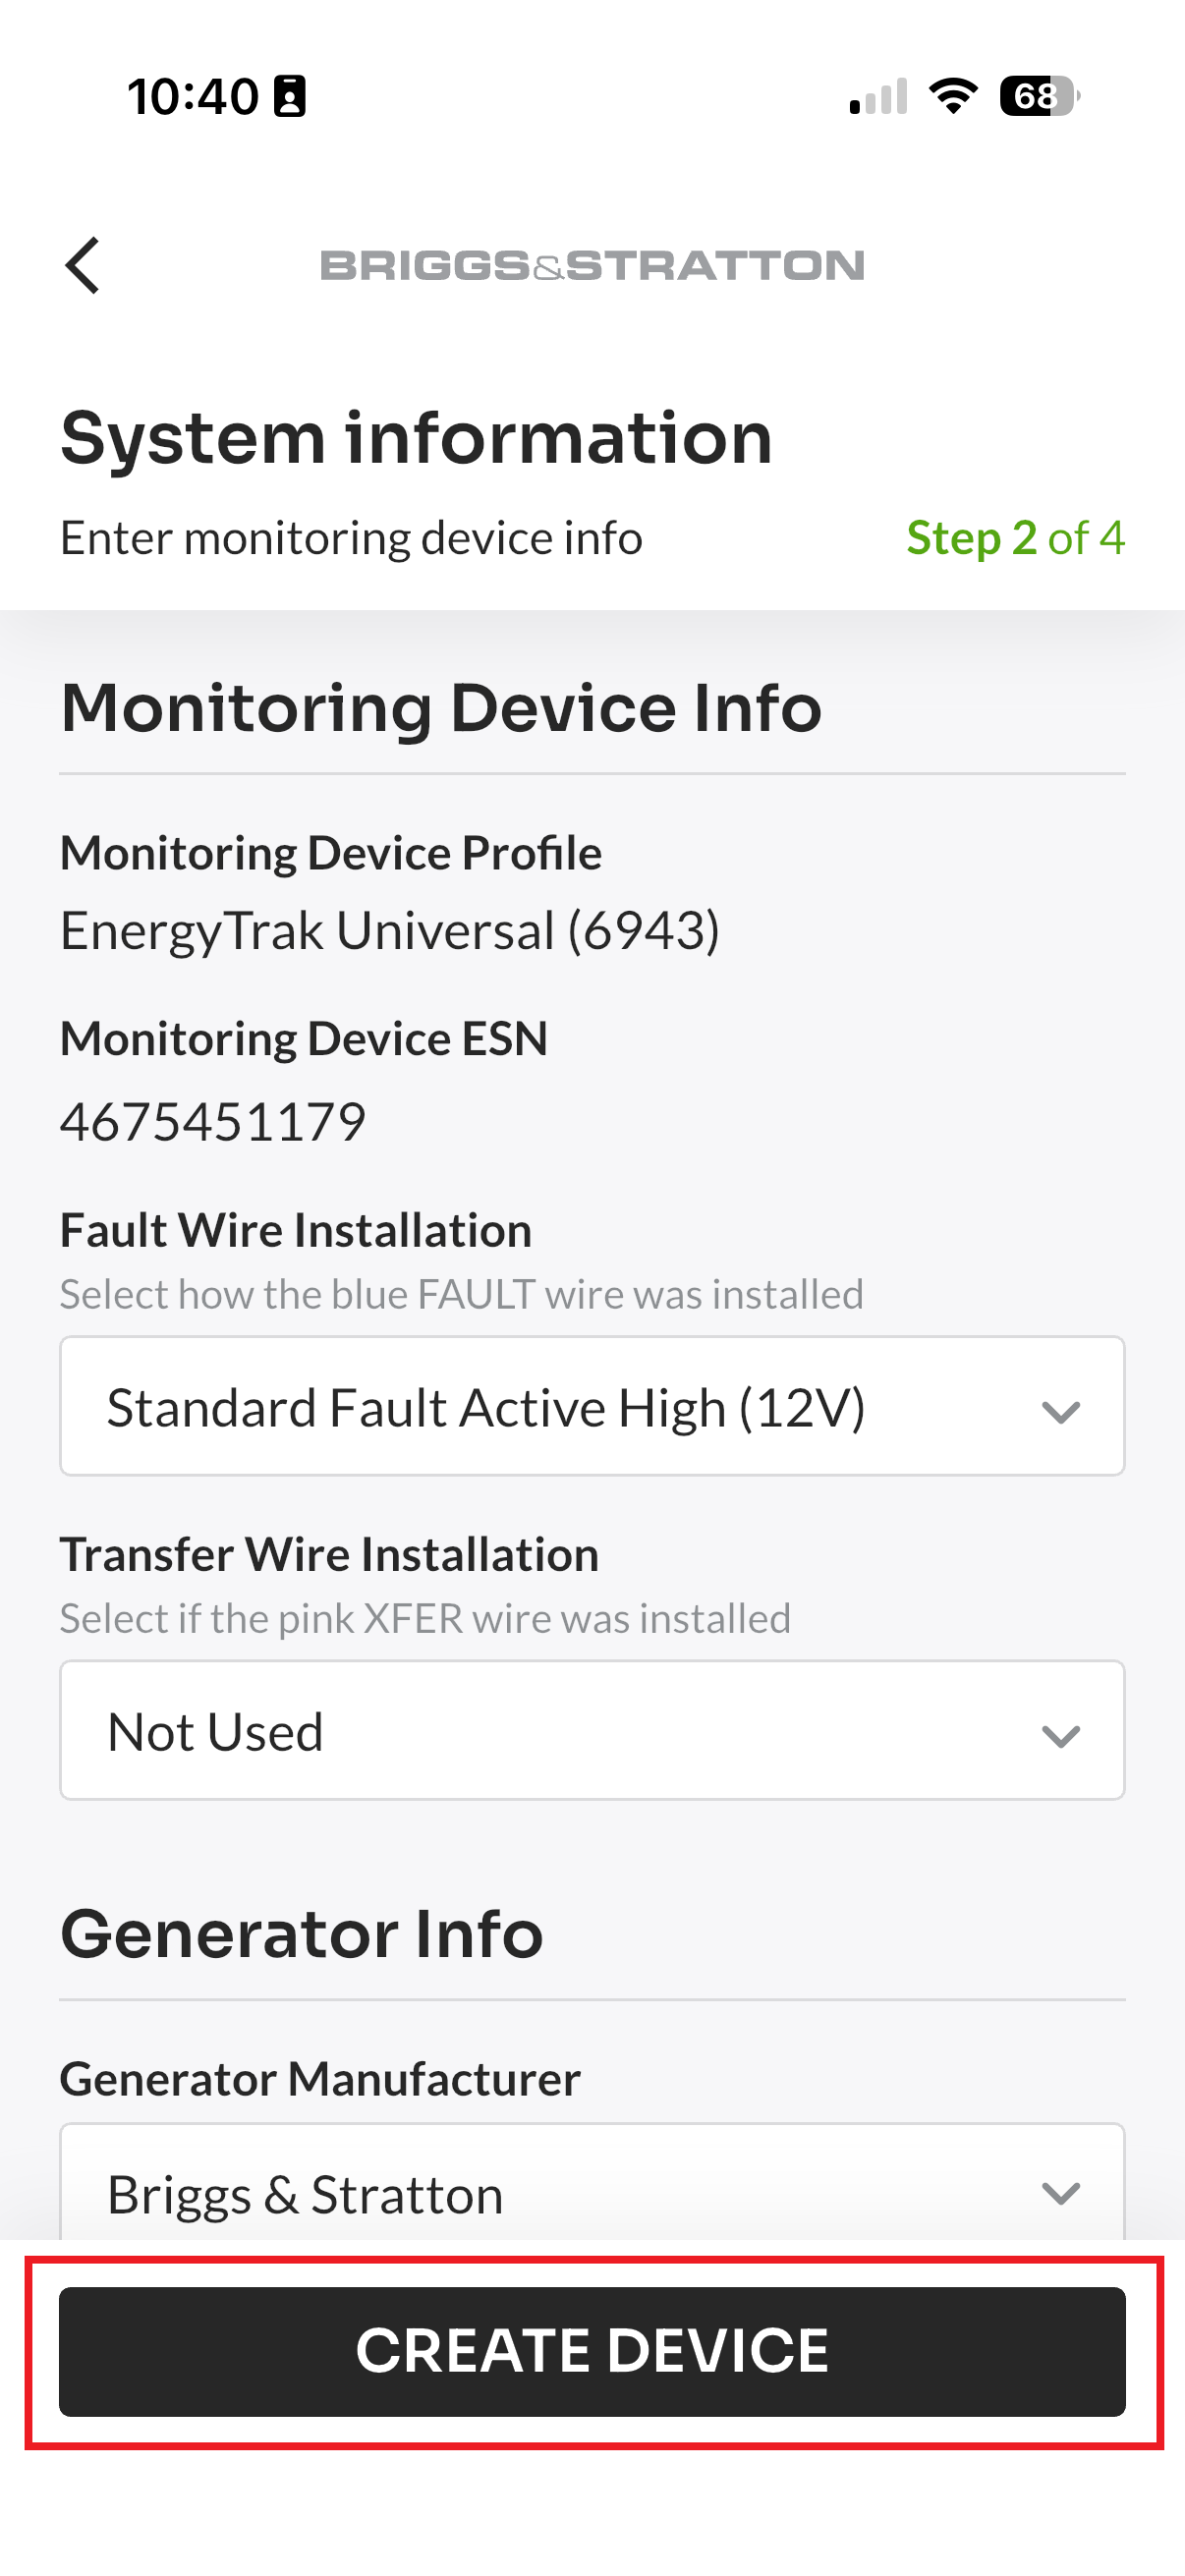
Step 4: System Information
The app will prompt you to complete all required device information. Once complete, click “Create Device.” Upon completion, you will be prompted to the Subscription Setup screen.
Step 5: Subscription Setup
On the Subscription Setup screen, select who will be responsible for the site’s annual EnergyTrak Premium subscription.
- Path A: Bill my Pro Business
- When you select “Bill my Pro Business,” the Pro will take on payment responsibility. A separate Stripe Payment Screen will launch for you to complete the payment setup for your business.
- Path B: Managed by System Owner
- When you select “Managed by System Owner,” the customer is responsible for the payment. You must ensure at least one System Owner is assigned to the site to complete setup if you select this option.
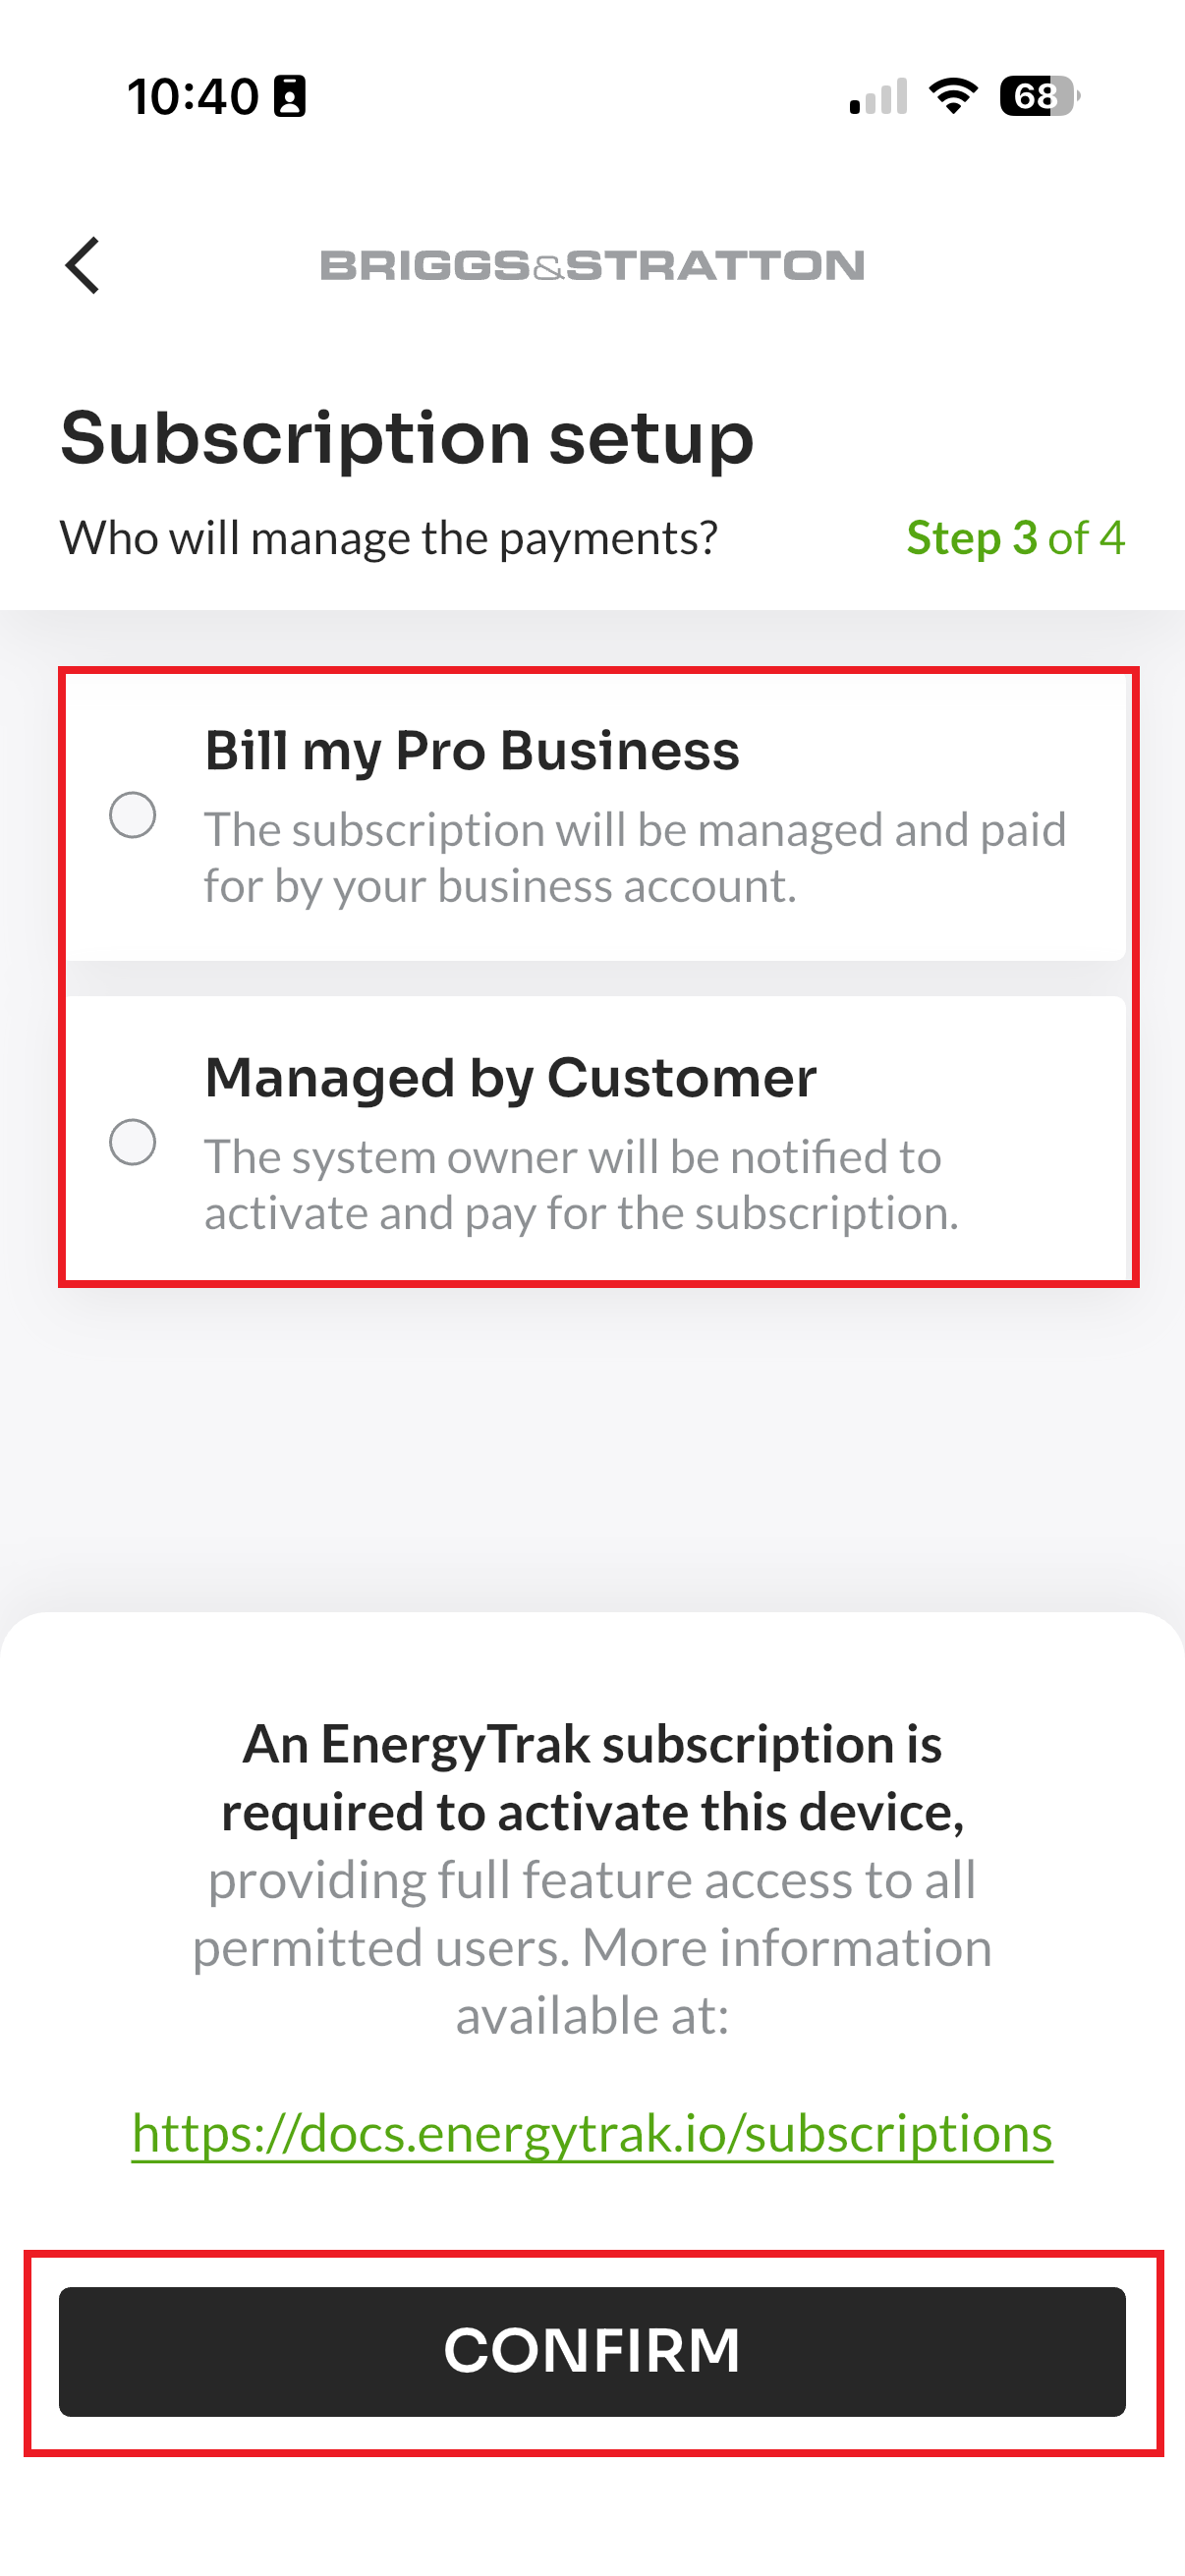
See our Subscription Management page for complete information on managing subscriptions.
Step 6: Setup Completion and Final Status
The set up process concludes with a screen confirming activation of the site. Lastly, you will be redirected to the Site Dashboard.
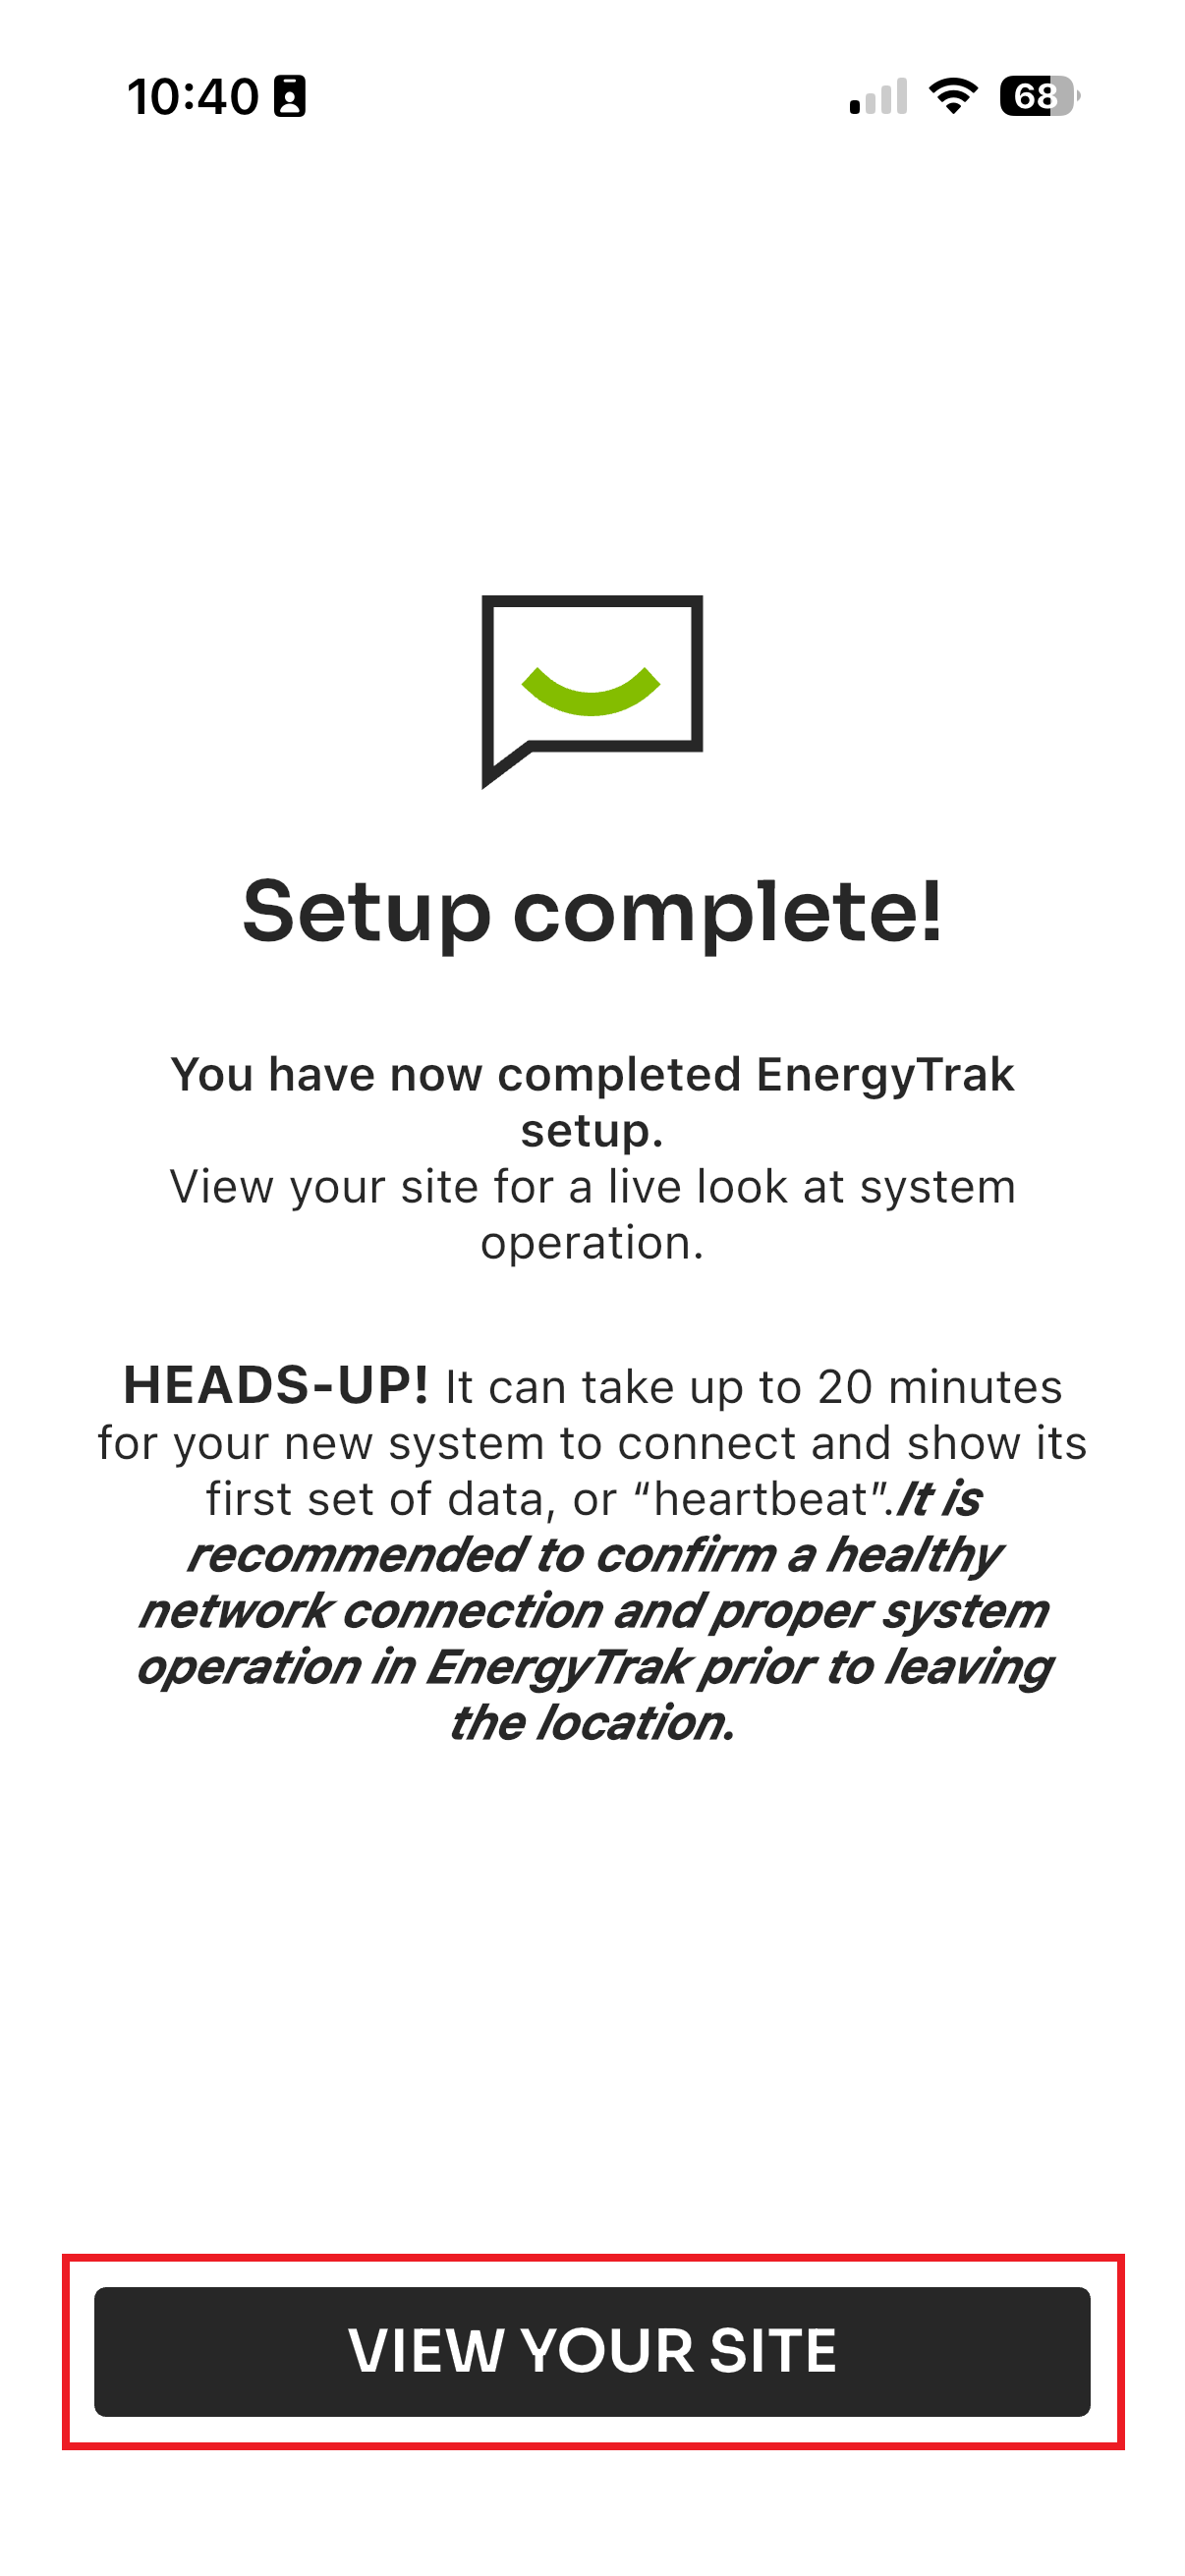
For more details on navigating the Site Dashboard screen, please refer to the Site Dashboard page.
Upon completion, the site state is universally set to “Pending.” This status indicates the site is fully set up, but awaiting final confirmation and data synchronization before displaying full, live status. You will see a site notification banner notifying you of your free 10-day trial grace period.
Step 7: Assigning a System Owner (Conditional)
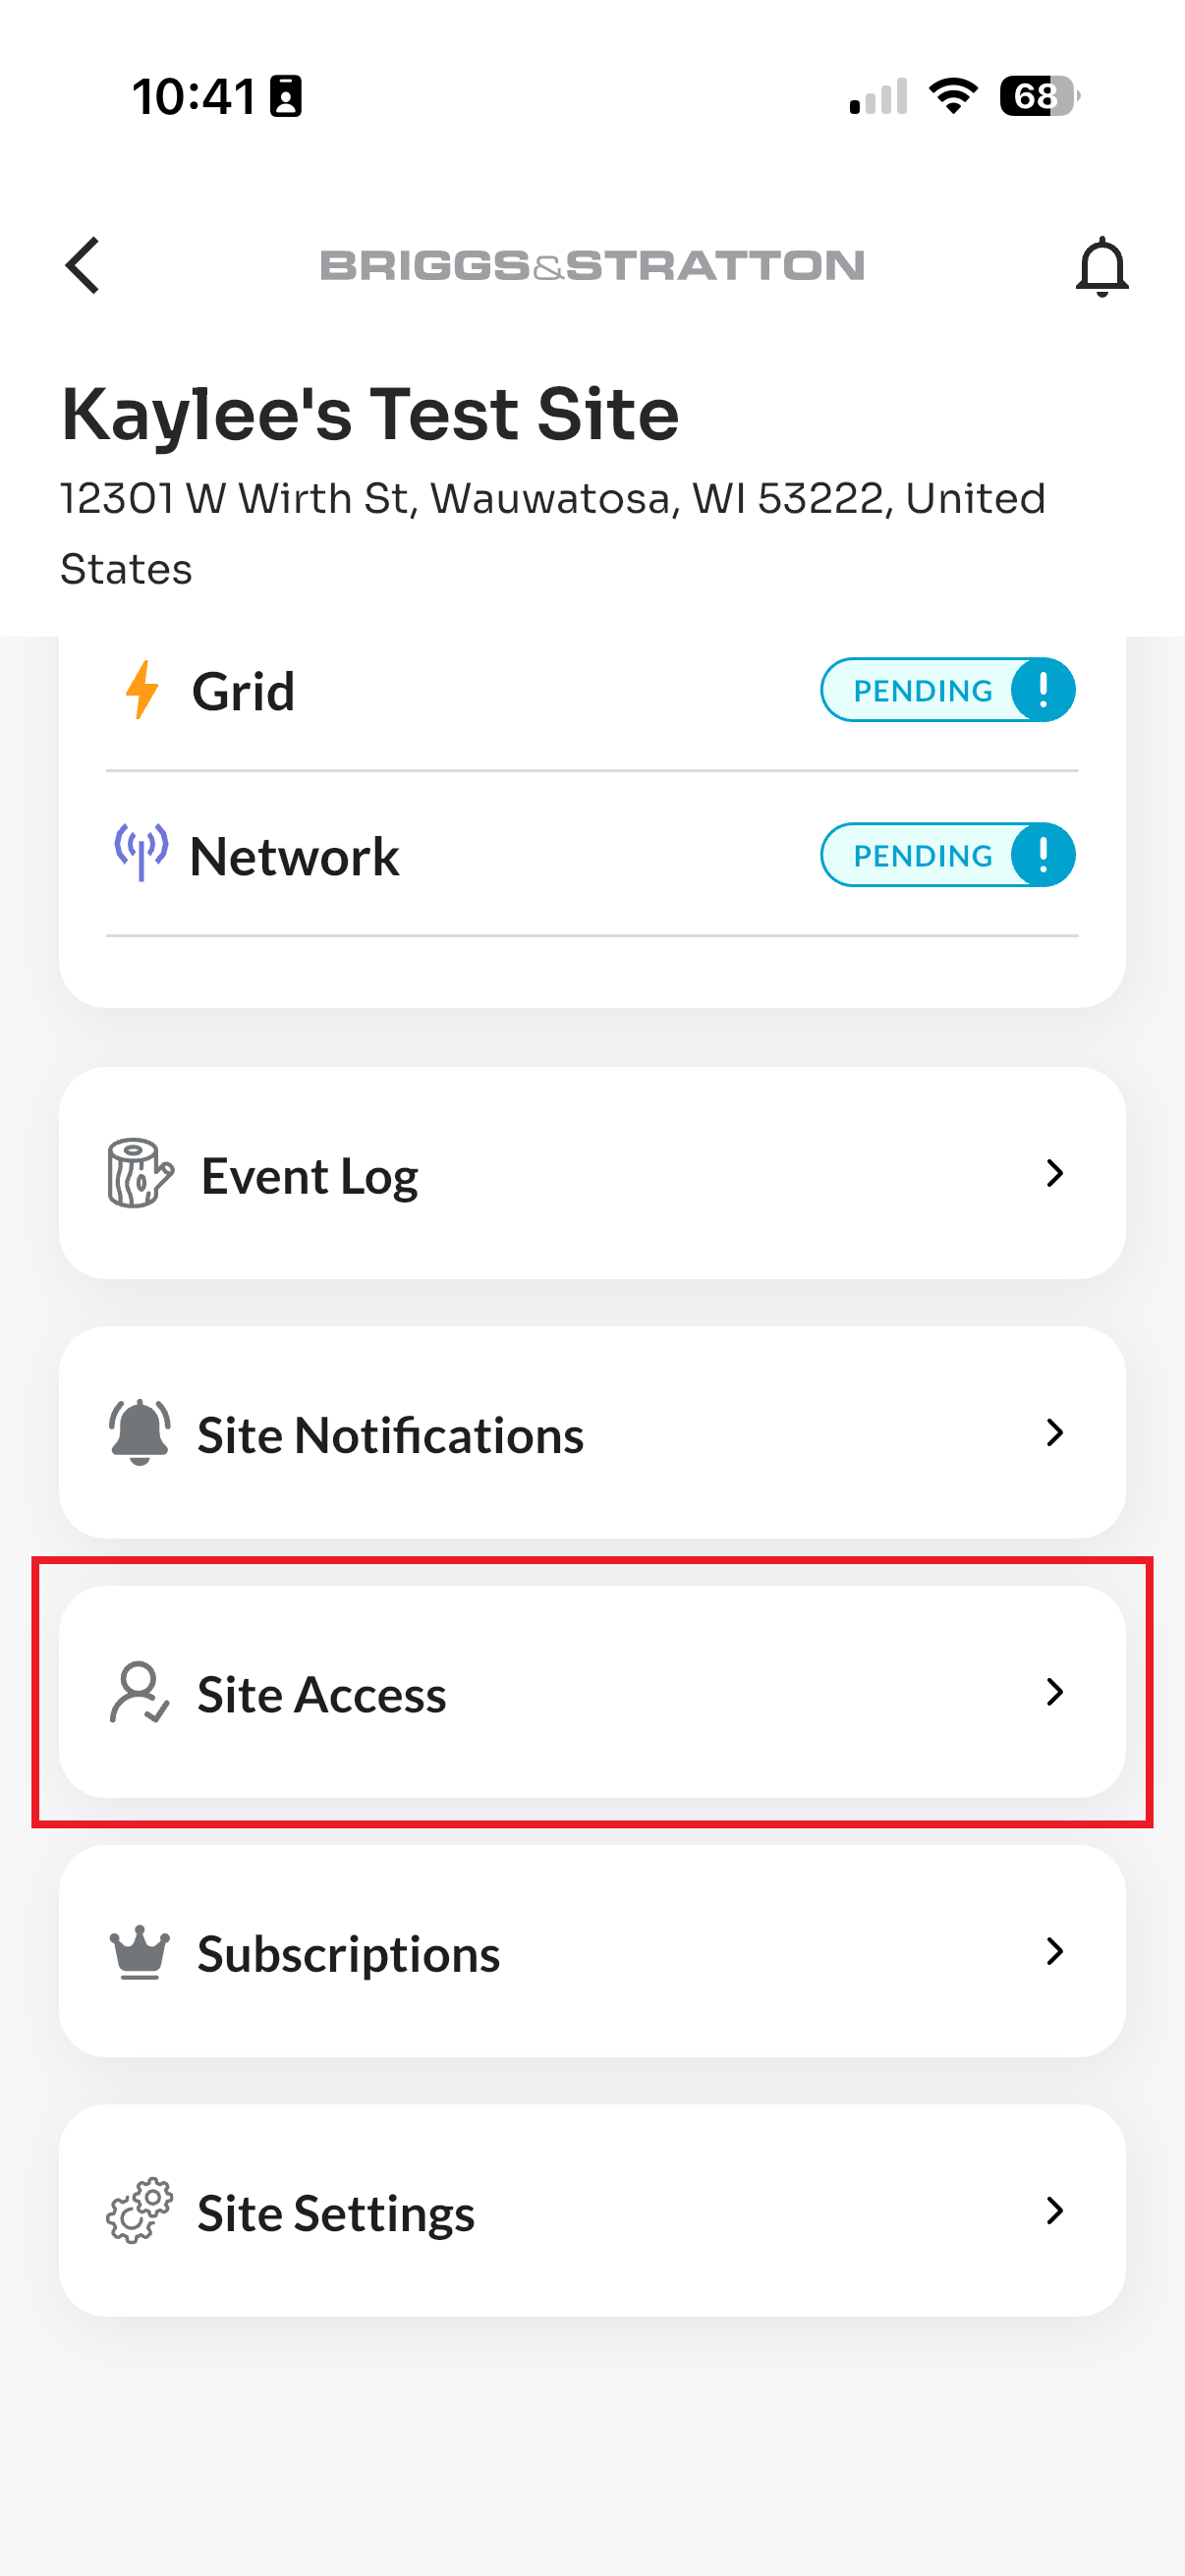
To assign a System Owner to a site, use the “Site Access” screen on the Site Dashboard.
- Choose “Add New System Owner,” or “Pick Existing User.”
- Confirm the owner information by entering their details in the given fields.
- Once a System Owner is properly added, you will see a screen confirming your assignment of a new user.
For detailed steps on user roles, permissions, and the user assignment process, please refer to the Users page.